-
Categories
- Modular Box Plates
- Cable Nail Clips
- Double Nail Clips
- Wall Plug Gitty Round Head
- Wall Plug Gitty Square Head
- Wall Plug Gitty Heavy
- Electrical Switch
- Electrical PVC Tape
- Hose Clamp Nylon
- Cable Ties Nylon
- Heater Elements
- Connectors & Joinders
- Multiplug
- Electric Holders
- 2 Pin Tops
- 3-Pin Top
- Male Female 2-Pin Tops
- Electrical Fan Regulater
- Open Fitting Series
- Automatic Change Over Switch
- MCB
- Electrical 5-Pin Sockets
- Bed Switches
- Switch 15A
- 5-Pin Sockets 15a
- 2-Pin Sockets
- Indicaters
- Modular Series
- Combined Boxes
- Emergency Lights
- Emergency / AC-DC Bulbs
- Table Lamps
- Emergency Lantern
- Festival & Decorative Lights
- Dj Lights
- AC Lights & Bulbs
- Gate Lights
- Garden Light
- LED Raw Material
- Hanging Light
- Wall Light
- Chandlier & Jhoomer Lights
- Mirror Light
- Wall Focus Lights
- Stair Light
- Wall Up Down Light
- Wall Down Light
- Four Way Light
- COB Down Light
- Deep Down Light
- Slim Track Light
- Track Light
- COB Light
- DC Lights
- Microscopes & Microscope Accessories
- SMD & SMD Accessories
- PCB Holder & Fixture
- Luowei Products
- CPU Drill Motor & Bit
- Other Mobile Parts
- Flex JCID
- Flux & Paste
- UV Ink
- Glue
- Glass Injection, Needle & Flux Handle
- UV+ Lamp & Smoke Fan
- PPD, Roshin & Roshin Pen
- Solder Ball, Wire & Battery
- DE Solder Wick
- Process Wire
- Solder Lungs/Welding Dots
- USB Charger
- Plier
- Heating Tape & Pad
- Art Knife & Blades
- Opener Tool
- DC Power Supply
- Power Booster Cable
- JCID Tools & Strips
- Watch Repair Tools
- IC
- Battery Booster
- Screwdrivers
- Bubble Remover
- Tweezers
- Screen Separator
- Dust Room
- Cutting Wire
- Glue Motor & Bit
- Blaster Pan
- Multimeter & Multimeter Wire
- Soldering Iron Station
- Iron Bit
- Liquid & Spray
- IP Bottle
- Cleaning Cloth
- Brush
- Dock Test Flex
- Oscilloscope
- Ultrasonic Cleaner
- Storage Box
- Thermal Camera
- Welding Machine
- Socket Middle Tester
- Matt
- Middle Frame & Rebailling
- Mac
- Pre Heater
- Mix Tool
- Mijing Green Oil Network
- Amaoe All Stencil
- Mobile Tool Kits
Switch & Switch Accesseries
Lights & Light Acceseries
Repair Tools
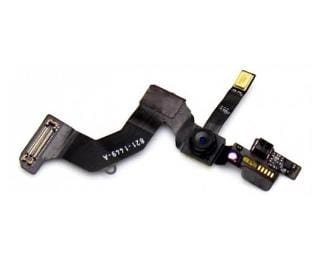
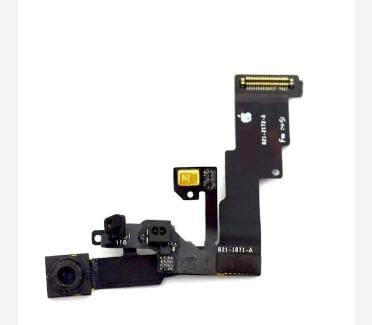
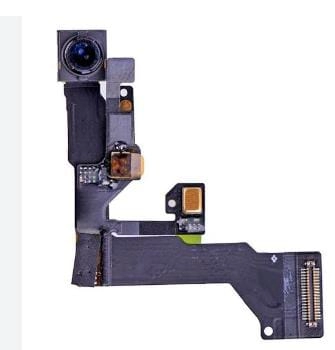
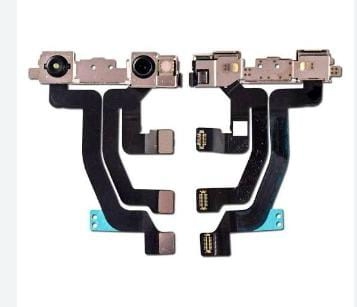
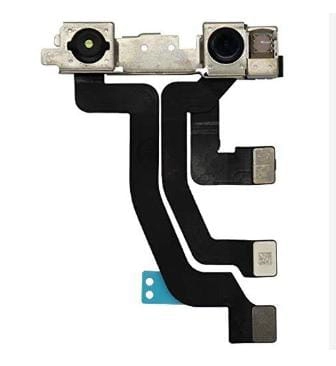
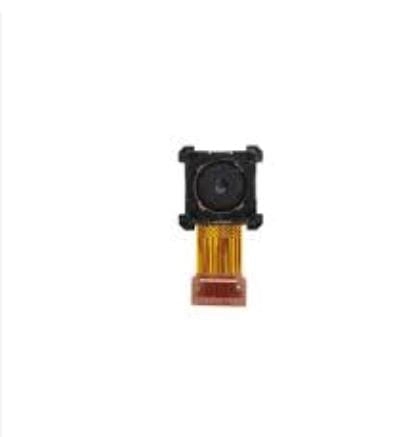
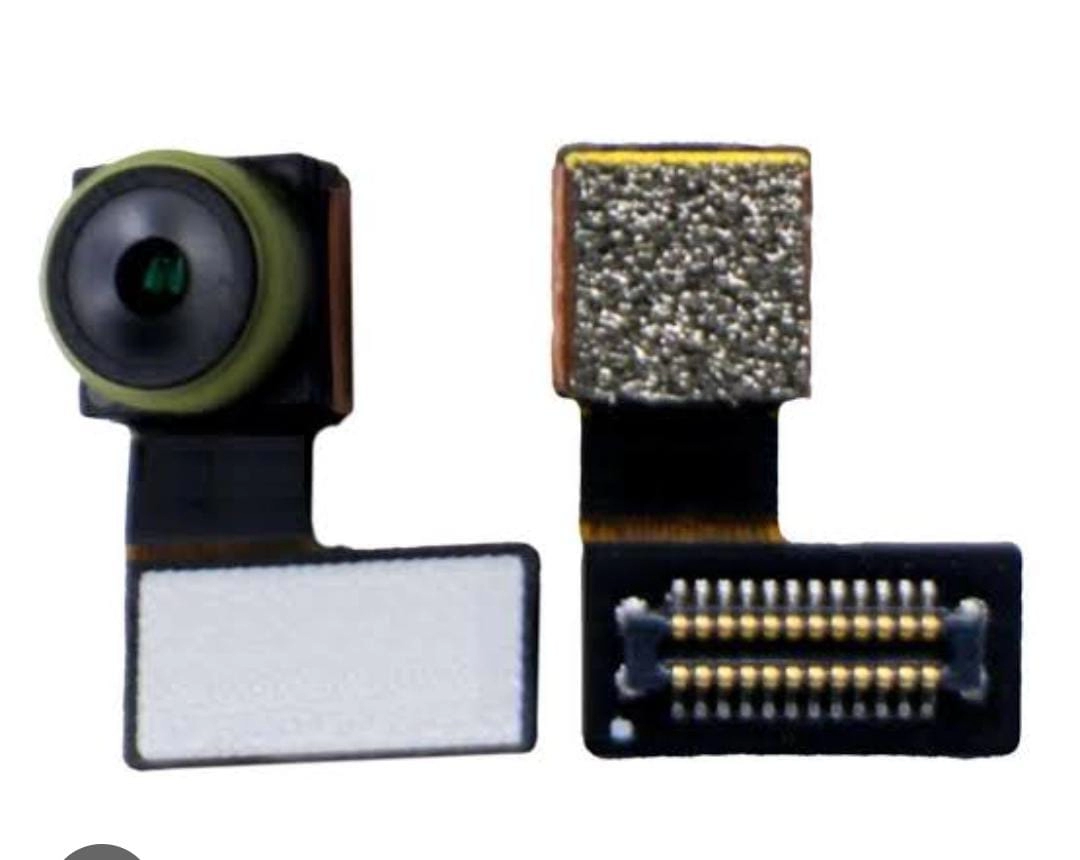
iphone Xs Front Camera
Key Features
- Extra 5% Cashback Discount on UPI Prepaid Payments
- Wholeseals! Earn more with Commission Grade-J
- 24 Hours Easy Return Policy
- Durable Build: Constructed from high-quality materials, the replacement camera is built to last, providing longevity similar to the original component.
- Easy Installation: Designed for straightforward replacement, making it easier for technicians or experienced users to install without requiring extensive technical knowledge.
- Auto-Focus Capability: Retains the auto-focus functionality, allowing for quick and precise focusing on subjects, ensuring crisp photos.
- HDR Support: Captures detailed and vibrant photos.
Frequently Bought Together
iPhone XS Front Camera Replacement
Highlights:
- Resolution: The front camera of the iPhone XS has a resolution of 7 megapixels, providing high-quality selfies and video calls.
- Video Recording: It supports 1080p HD video recording, ensuring clear and smooth video chats and quick video captures.
- FaceTime HD Camera: Specifically designed for FaceTime, Apple’s video calling service, ensuring high-quality video calls.
- TrueDepth Camera System: The front camera assembly includes the standard front-facing camera, an infrared (IR) camera, and a dot projector, which are integral to Apple’s Face ID technology.
- Sensor Integration: The front camera module includes the proximity sensor, ambient light sensor, and a secondary microphone, which help in adjusting the screen brightness and turning off the display during calls.
Applications:
- Selfies and Video Calls: The primary use of the front camera is for taking high-quality selfies and making video calls through apps like FaceTime, Zoom, and Skype.
- Face Detection: The camera supports face detection, enhancing the quality of photos by focusing on faces and adjusting the exposure accordingly.
- Augmented Reality (AR): The front camera can be used for AR applications, such as AR filters in social media apps and other AR experiences.
- Face ID: The TrueDepth camera system enables Face ID, allowing secure unlocking of the phone, authentication for apps, and Apple Pay.
- Security Features: The front camera works in conjunction with the proximity sensor to detect when the phone is close to your face, turning off the display to prevent accidental touches during calls.
Replacing the front camera of an iPhone XS can restore its functionality if the original camera is damaged or malfunctioning. This replacement process typically involves the following steps:
- Power Off the Device: Ensure the iPhone is powered off to prevent any electrical damage.
- Remove the Display: Use a suction cup and a plastic spudger to carefully lift and remove the display. Be cautious of the display cables.
- Disconnect the Battery: Disconnect the battery to ensure safety during the replacement process.
- Remove the Old Camera Module: Carefully disconnect and remove the old front camera module, which includes the front camera, IR camera, and dot projector.
- Install the New Camera Module: Place the new front camera module in position and reconnect it to the logic board.
- Reassemble the Device: Reconnect the display cables, secure the display, and power on the device to test the new camera.
It’s important to note that replacing the front camera assembly may result in the loss of Face ID functionality, as the components are paired to the logic board for security reasons.
Technical Details
| Brand: | iPhone |
|---|---|
| Model number: | XS |
| Seller SKU: | Fatima-430 |
| Condition: | New |
| Origin: | India |
| Availability: | In Stock |
| Minimum order quantity: | 1 |
| Shipping weight: | 500.00 g |
| Date first listed on DP MART : | Sep 1, 2024 |
iPhone XS Front Camera Replacement Specifications
Resolution:
- The front camera has a resolution of 7 megapixels.
- Capable of recording 1080p HD video.
Aperture:
- Features an f/2.2 aperture, which helps in capturing better low-light photos.
Sensor Type:
- Utilizes a CMOS sensor for image capturing.
Field of View:
- Offers a wide-angle lens with a field of view of approximately 65 degrees.
Additional Features:
- Face Detection: Enhances focus on faces during selfies and video calls.
- HDR: High Dynamic Range for improved contrast and color accuracy.
- Burst Mode: Allows capturing multiple photos in quick succession.
- Retina Flash: Uses the display as a flash for better lighting in low-light conditions.
- Infrared (IR) Camera and Dot Projector: Integral parts of Apple’s Face ID technology
Key Features and Applications
Video Calls:
- Ideal for video conferencing and FaceTime calls, providing clear and stable video quality.
Selfies:
- Designed for taking selfies with good clarity and color reproduction.
Face Recognition:
- Supports advanced face recognition features for unlocking the phone and other applications.
Augmented Reality (AR):
- Can be used in AR applications for a more immersive experience.
Social Media:
- Perfect for creating content for social media platforms, ensuring good quality images and videos.
Repair and Replacement:
- This replacement part is used to fix issues like blurry images, non-functional camera, or physical damage to the front camera module.
Installation Notes
- Tools Required: Precision screwdriver set, plastic opening tools, tweezers, and suction cup.
- Skill Level: Moderate; requires careful handling and some technical knowledge.
- Time Required: Approximately 30-45 minutes.
No reviews
Related Items
Delhi, Delhi
kkspare1404@yopmail.com
Sk Kased Verified Purchase | 2 months ago
Service Not Good Ail Product Not Bya


